

The Sixer Fixer-upper: Part 1
Entry posted by Nathan Strum
737 views
So, I've been blogging again (in case you haven't noticed). I'd stopped blogging months ago due to the blog software here being a complete, hopeless mess. (This isn't a dig at AtariAge, but rather at InVision who makes the software, and absolutely ruined it during a previous "upgrade". The worst offense being the removal of categories, completely destroying anyone's ability to organize or find content.)
What started my renewed interest in blogging was when James (of ZeroPage Homebrew) took me up on my offer to try repairing his RGB-modded Atari 2600 that he uses on his livestream.
It wasn't so much the repair that got me thinking about blogging, but documenting the process and writing it all up. I found that I missed writing stuff. Or more to the point, reading peoples' responses to writing stuff. On the rare occasion that happens. ![]()
You can read the whole repair story in the ZeroPage Homebrew Club here on AtariAge: https://atariage.com/forums/topic/307533-atari-rgb-light-sixer-repair/
Here are the different chapters, if you want to read it a piece at a time:
Chapter 2: Tracing the problem
Chapter 4: Testing the old mod
Chapter 5: Repairing some crispy wires
Chapter 6: Assembling the new mod
Chapter 7: Cabling for the Framemeister
Chapter 8: Testing flash carts
Chapter 9: Wiring up the new mod, and initial testing
Chapter 10: More Framemeister cable fun
Chapter 11: Reinstalling the mod
Chapter 12: Reassembling and routing wires
Chapter 13: Patching the case, installing Molex connectors
Truly a gripping saga.
At the end of that saga, I decided to repair my own 2600. Again. But first, a little recap of its history prior to that point...
I bought my 2600 from Sears as a factory refurbished unit, on August 10, 1981 for $139.99. I still have the receipt:
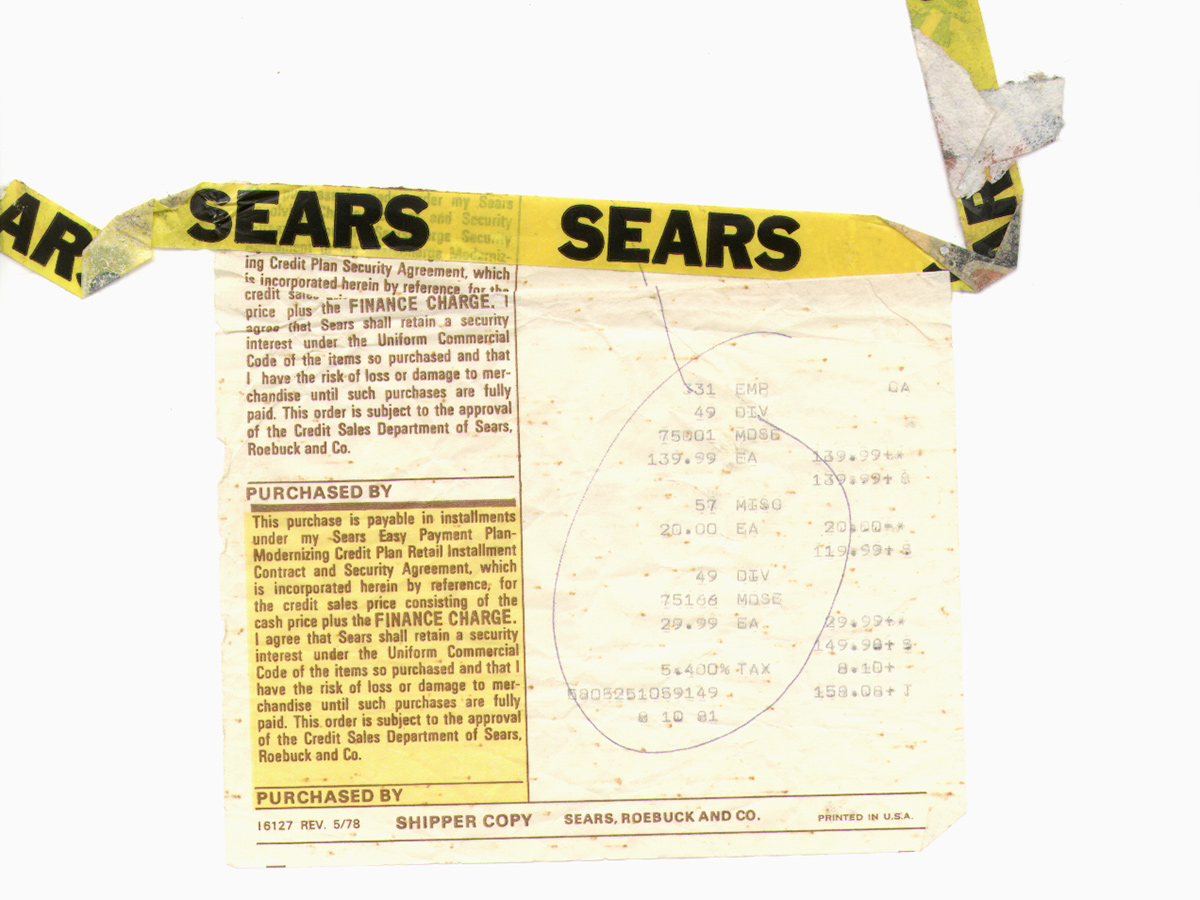
I saved a whole $8 by buying a refurb! Score!
Within a couple of years though, the console stopped working, so my dad drove me out to Martha Lake Electronics (north of Seattle) to have it repaired. I'm not sure what they replaced - I think it may have been a capacitor. Anyway, my console worked just fine after that, until it was eventually supplanted in 1987 by my Atari 7800 and put away. The 7800 was likewise put away a few years later when I moved and didn't have the space to bring my games with me. (I did buy a Lynx in September 1991 though. And yes, I still have the receipt for that, too. ![]() )
)
Anyway, I finally started getting back into the 2600 in 2002 when I discovered AtariAge and homebrew games. Upon unpacking my games and system (which had been shipped to me by my parents), I discovered that the springs in the Select and Reset switches were shot, so I ordered and installed a new set of switches from B & C ComputerVisions.
In November 2003 I installed a CyberTech S-Video mod, adding it to my Atari 2600 Video Mods Comparison Project (long since out-of-date).
In early 2008, my 2600 up and died while I was testing the 2007 AtariAge Holiday Cart (Stella's Stocking). That turned out to be the hex buffer. So I bought a new one, and socketed the new chip for easier future replacement.
Then, in 2011, it up and died again. But this time it wasn't the hex buffer. I tried swapping chips with a spare console (a "Vader") given to me by a friend, but to no avail. So the Vader became my daily driver. Unfortunately, it didn't have an S-Video mod, and one of the pins had broken on mine, so I was stuck with noisy RF output.
In 2015 I bought a set of populated donor boards from Best Electronics. I had hoped to use them to fix my original console, but I still couldn't make it work. So the donor boards went into my Sears shell, and that became my console for awhile. It wasn't without problems though - since whenever I pressed the fire button, the picture brightness changed. But at least it worked.
In 2017 I was determined to fix my console once-and-for-all. I installed a re-cap kit and new voltage regulator, and after some more chip-swapping, finally managed to get it working again. I also managed to fix my S-Video mod. Although it turns out, that fix wouldn't be as good as I thought.
But it wasn't fully working. It developed an issue where the console would only work if an AtariVox was plugged into the right joystick port. But it was working enough to use.
In 2018, I restored its original chrome-capped switches (because they look super-cool), but the other issue persisted. It wasn't really a problem, except that I could never plug anything into the right joystick port except an AtariVox. No joystick, paddles, keypad, driving controller - nothing. This became a problem when Robotron went into development in early 2020, and I could only test it with dual joysticks on my RF Vader, or my RF 7800. This just wouldn't do.
So that brings us to July 2020, where after fixing James' console, I decided to fix mine. Finally. Permanently. So I replaced the RIOT and hex buffer, and removed and reinstalled the mod (to test the console with stock RF out). I also used a Molotow chrome pen to restore the trim around the bezel. And finally, my original 2600 was back!
For about a week. Then it died again.
So that brings us up to the present. It's been my intention since July to fix my 2600. Again. Permanently. Again.
(I should point out by "permanently" I don't mean actually expect it to keep working "forever", but rather that everything gets fully fixed, and nothing is lingering. So "completely" is probably more accurate, although I'm certainly hoping for some longevity.)
Since restarting my blog recently, I thought this would be a good time to do the repair, and document it here. Coming sort-of full circle on what got me back to blogging in the first place. But there's another reason, too.
Game reviews.
(Edit: It's been so long, I actually forgot to write that as Homebreviews. You'd think that would've been almost automatic by now.)
I still have a stack of homebrews sitting here to review. And another stack that hasn't been shipped to me yet. And another stack on the verge of being released.
I have a lot of reviews to catch up on. And I won't review games on anything but real hardware. And I don't want to review games on anything but my own, original, S-Video modded console.
So it needed fixing.
And here then, is that story.
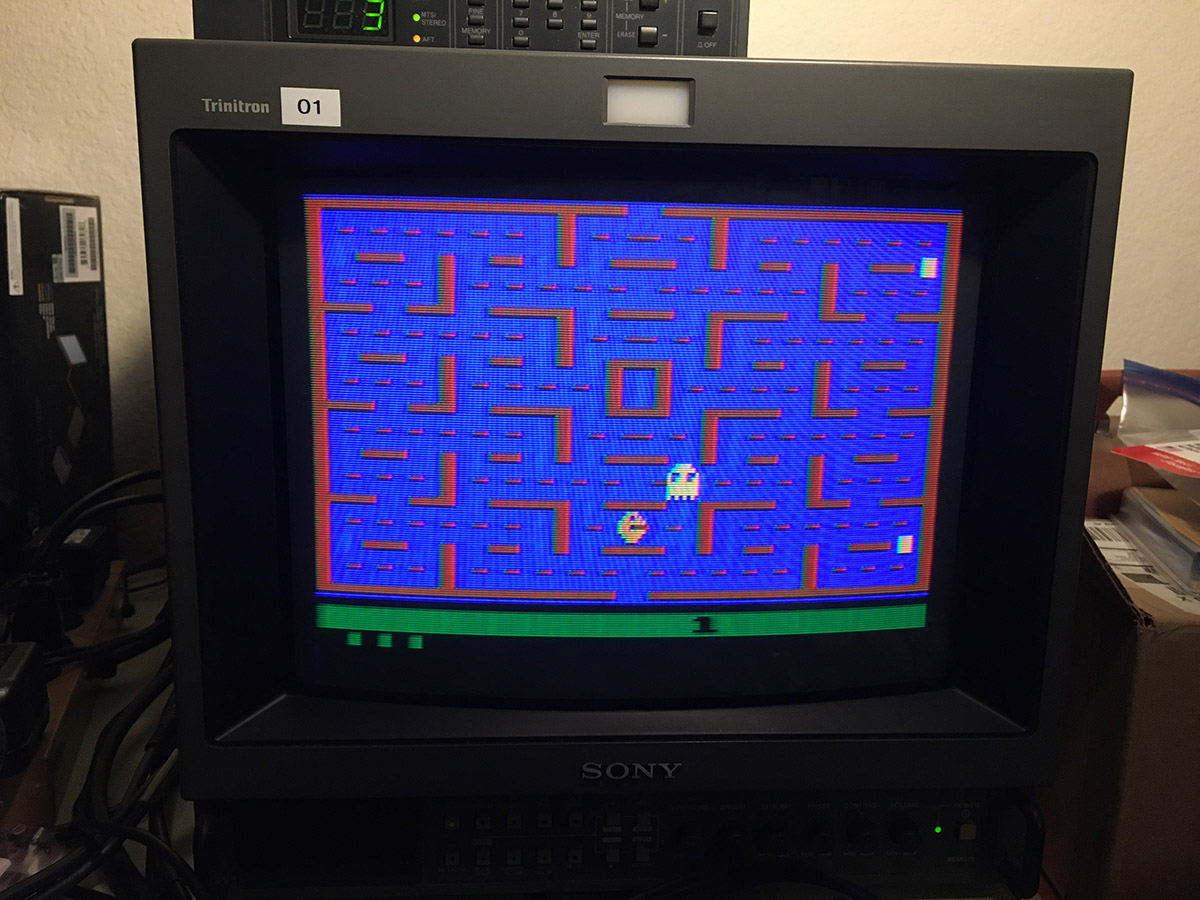
The problem, is that my 2600 either outputs this (which is supposed to be Pac-Man):
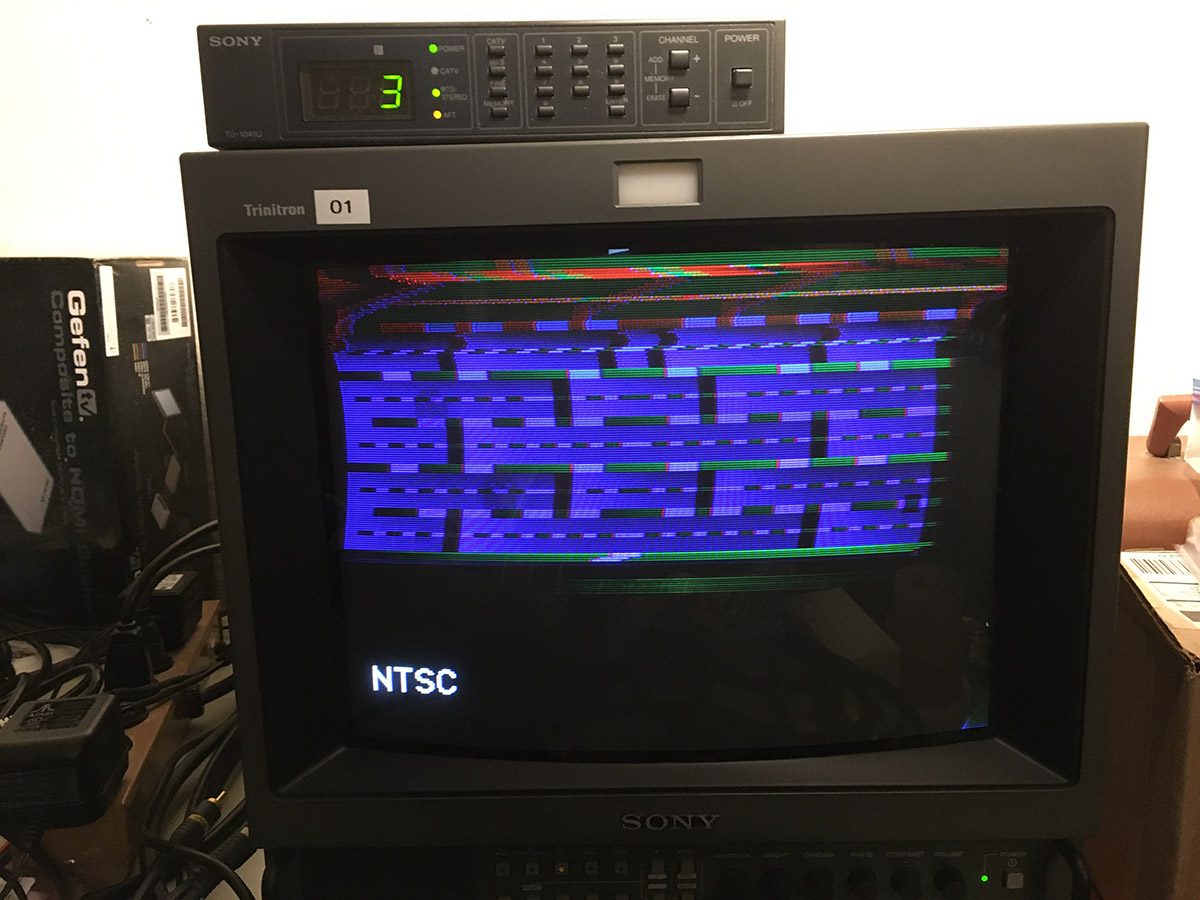
Or this (still Pac-Man):
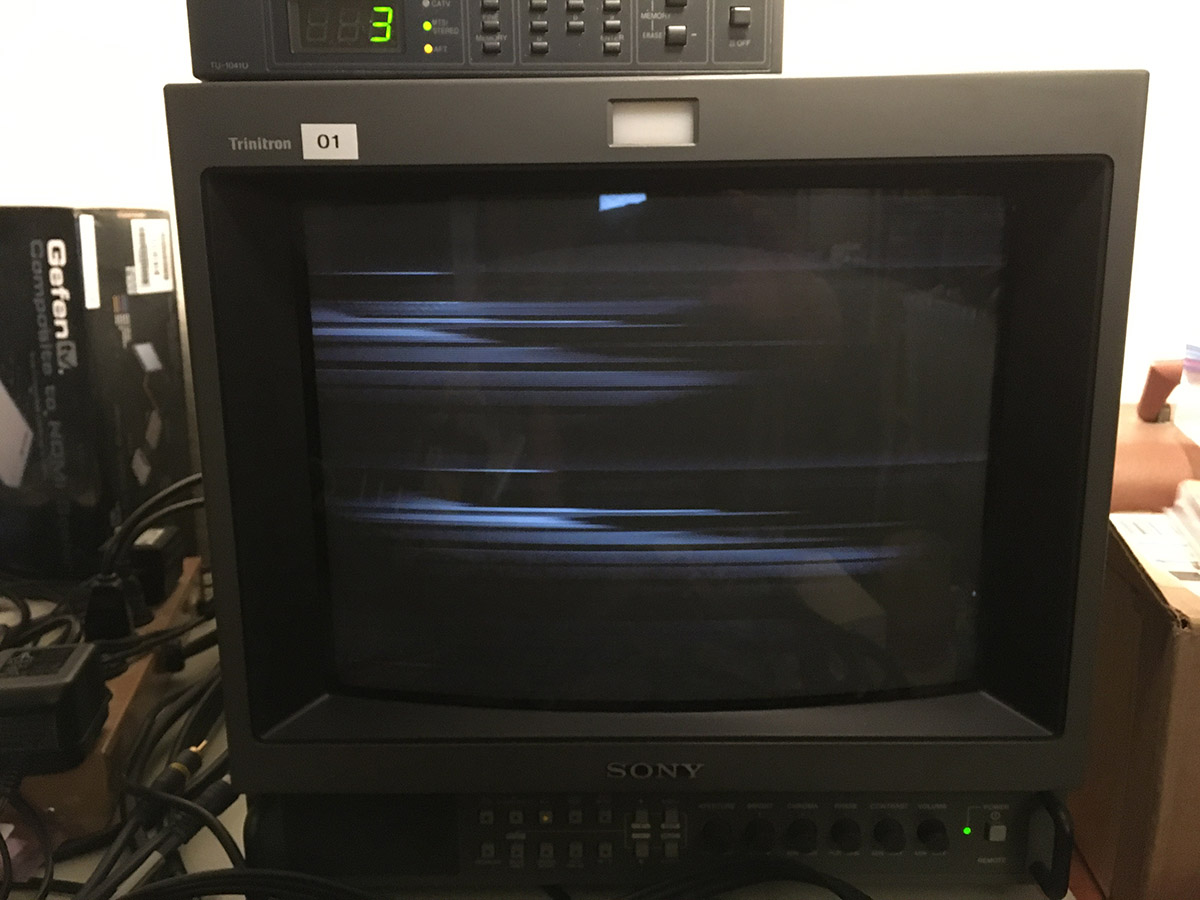
Audio, however, works. So is this the TIA? The hex buffer again? The S-Video mod? Well, only one way to find out! Time to tear it open!
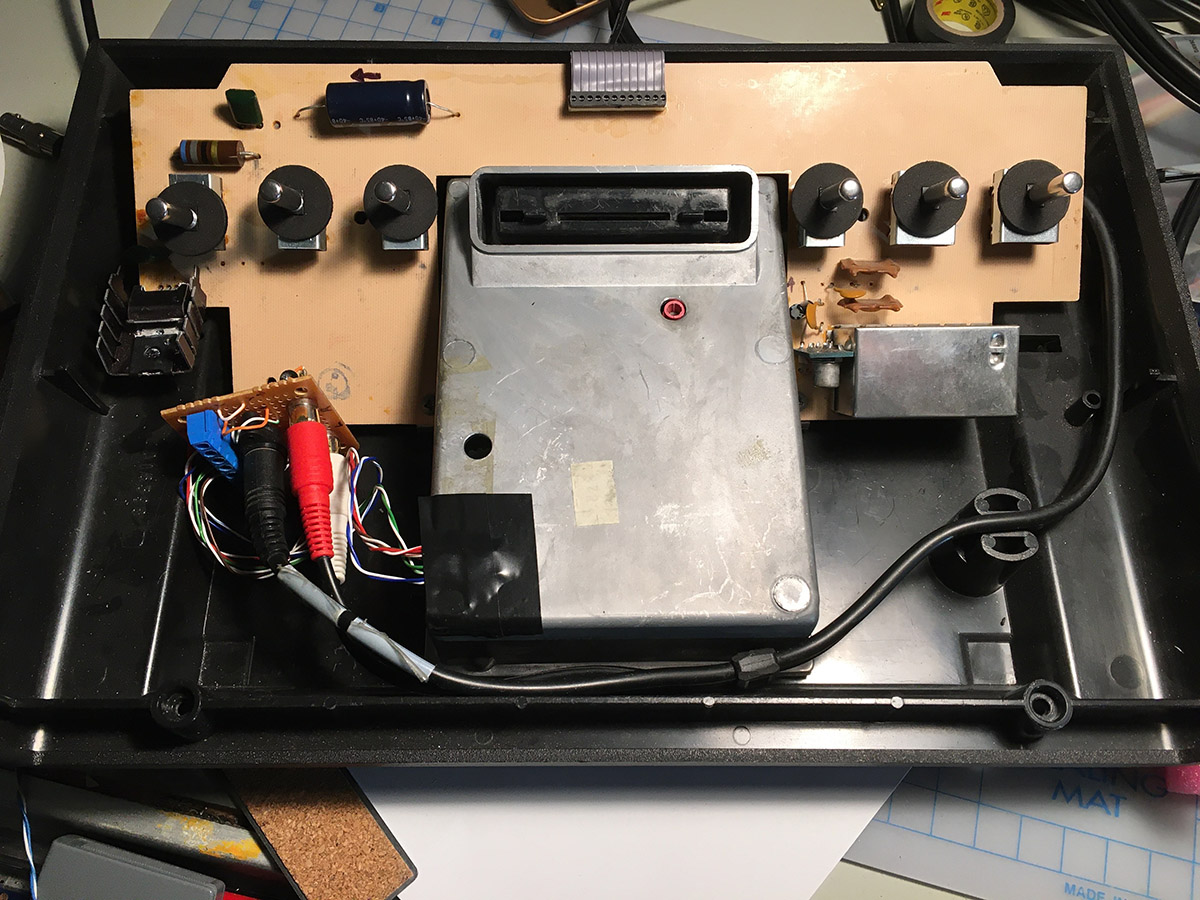
The S-Video mod is under the metal shield. Thin wires (single-strand wires from an old Cat 5 cable) come out a hole in the top, and go over to a small circuit board I used to test S-Video mods with. It has an S-Video jack and two audio jacks, with a small terminal block to easily connect and test different mods. From there, I plug in an S-Video + audio cable and run it out the back of the console. Originally, the wires were soldered directly to an S-Video + audio cable, but it made disassembly a chore. So having something I could plug and unplug made it somewhat easier to work on.
The downside? A 12-foot long cable hanging out the back of my 2600, which I have to unplug from my AV receiver every time I want to move the 2600. I didn't want to install jacks on the back of the 2600 since drilling holes is, well, permanent. Another downside is that running the wires through the top of the shield means that I can't really open the 2600 up, without either disconnecting all of the wires from the board, or leaving it connected and it getting in my way.
Here's a closer look at the hookup board.
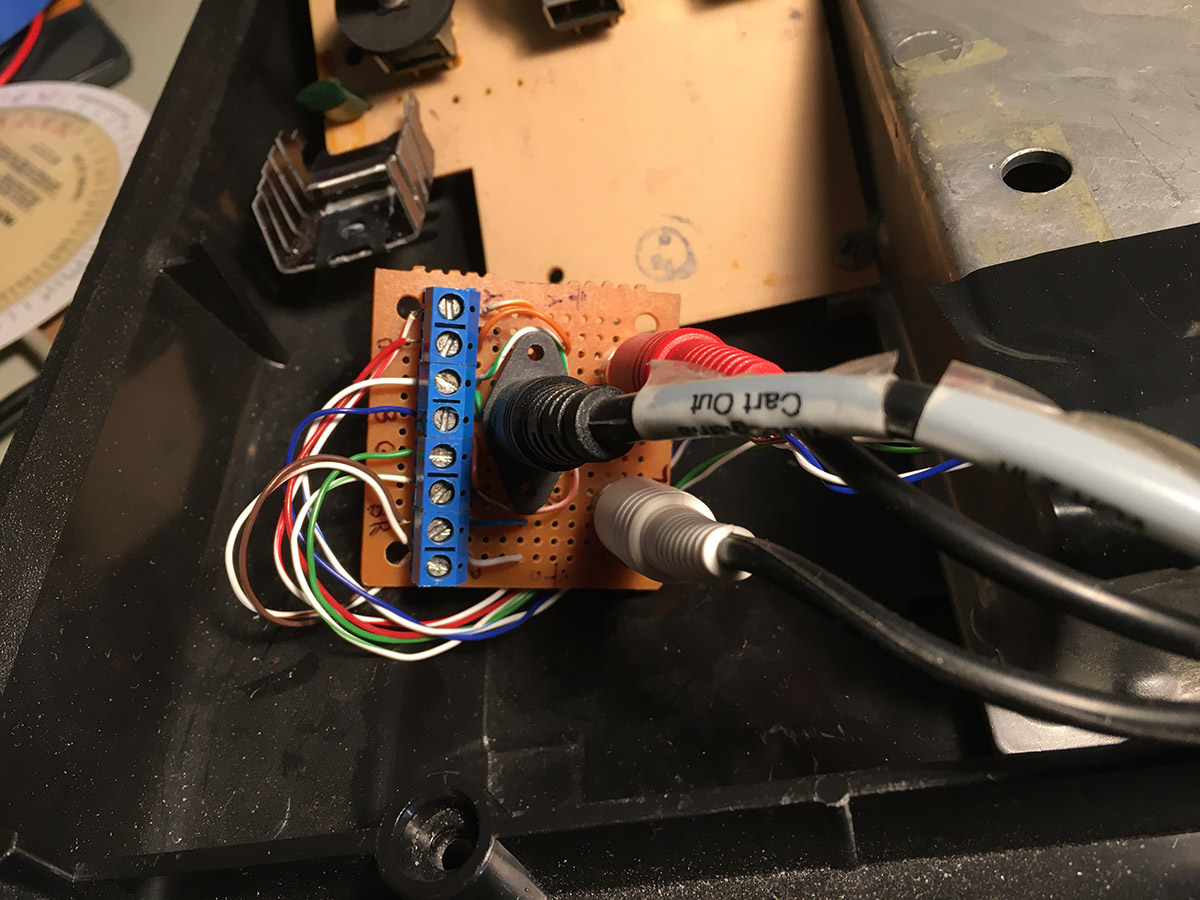
And here it is opened up. See the problem with the board hanging on there? The wires go through the shield, so everything is connected together.
The other downside is that while the single-strand wire is incredibly easy to work with, it's not durable. Bend it a few too many times, and snap! At the base of the green wire is a capacitor that's soldered to the mod board, and is also in danger of its leads snapping off (it's happened before).
So I decided as part of this endeavor, I was going to rewire the S-Video mod, fixing all of these issues. Mmmmmm... fresh solder!
First though, I had to figure out the problem. I removed the S-Video mod, and reinstalled the TIA, just to see if the 2600 was working.
Success!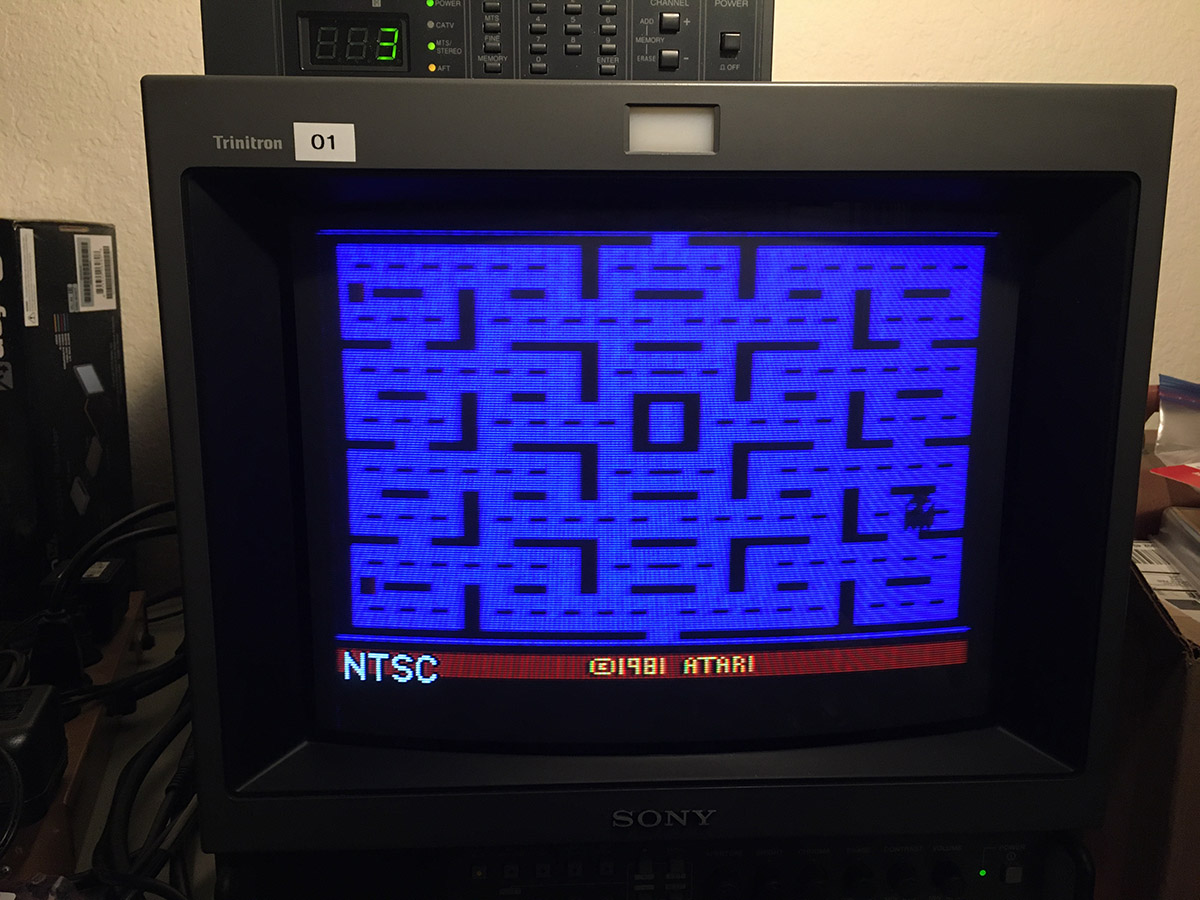
Pac-Man booted up and played just fine. So the 2600 itself was healthy. The problem was with the mod.
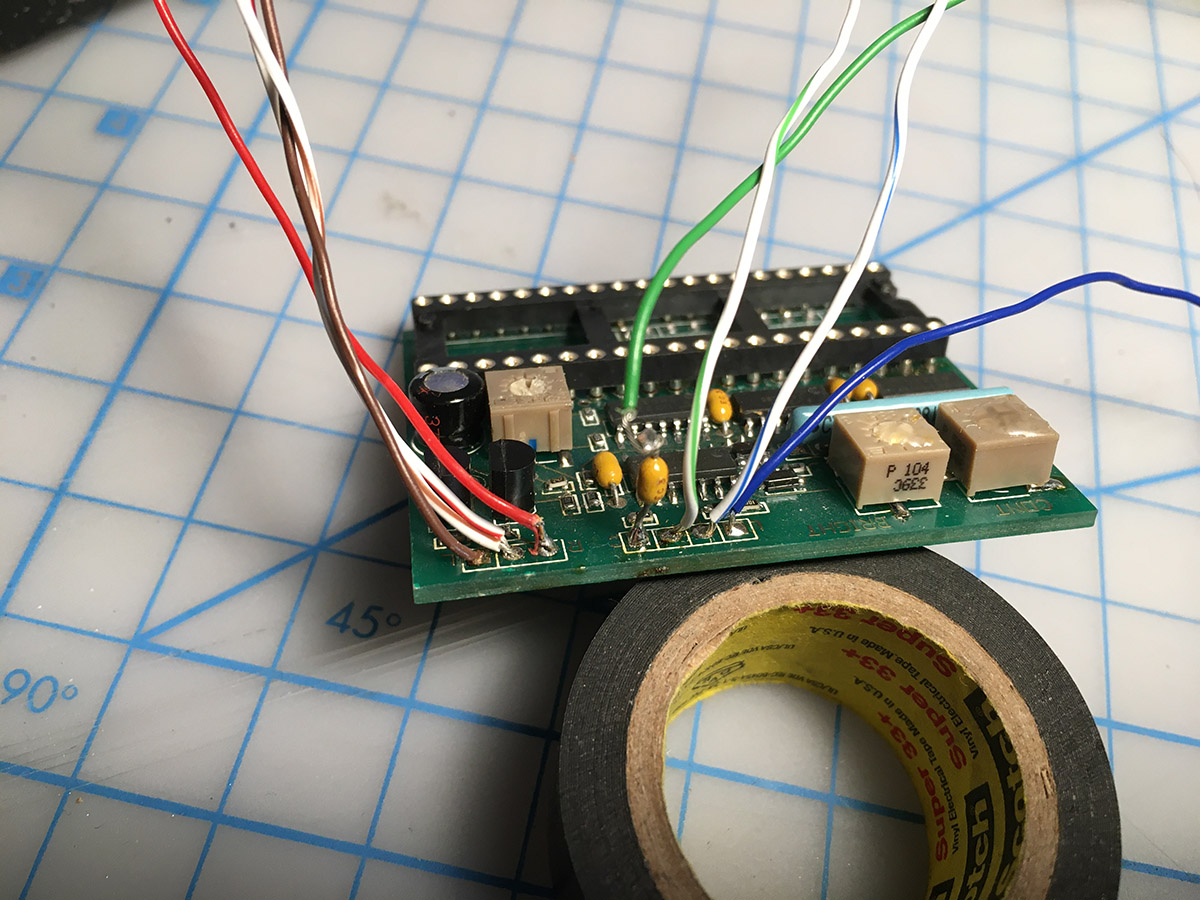
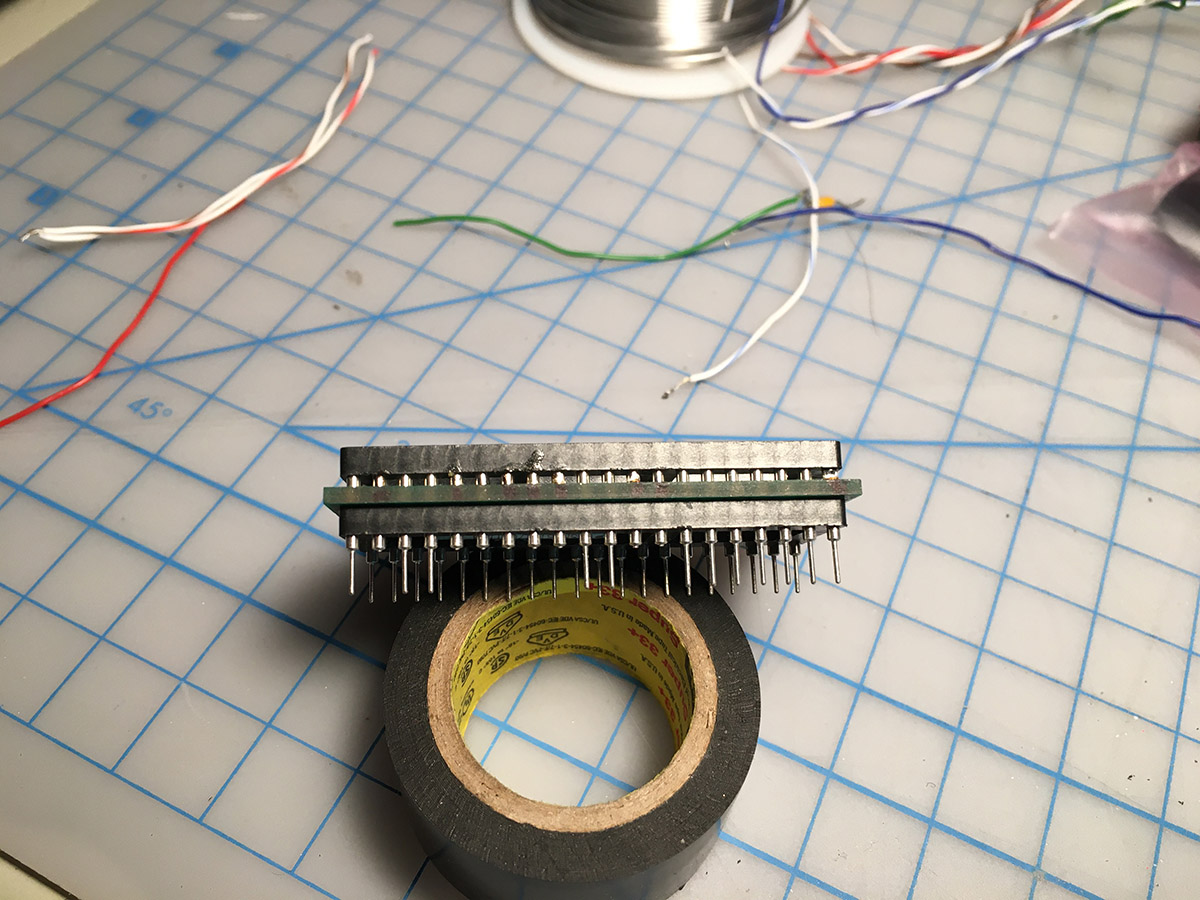
Examining the mod board revealed the problem. Look at the space between the board in the middle, and the socket (which I'd installed as a spacer) below it. It's not even! The lower right corner kept popping back out.
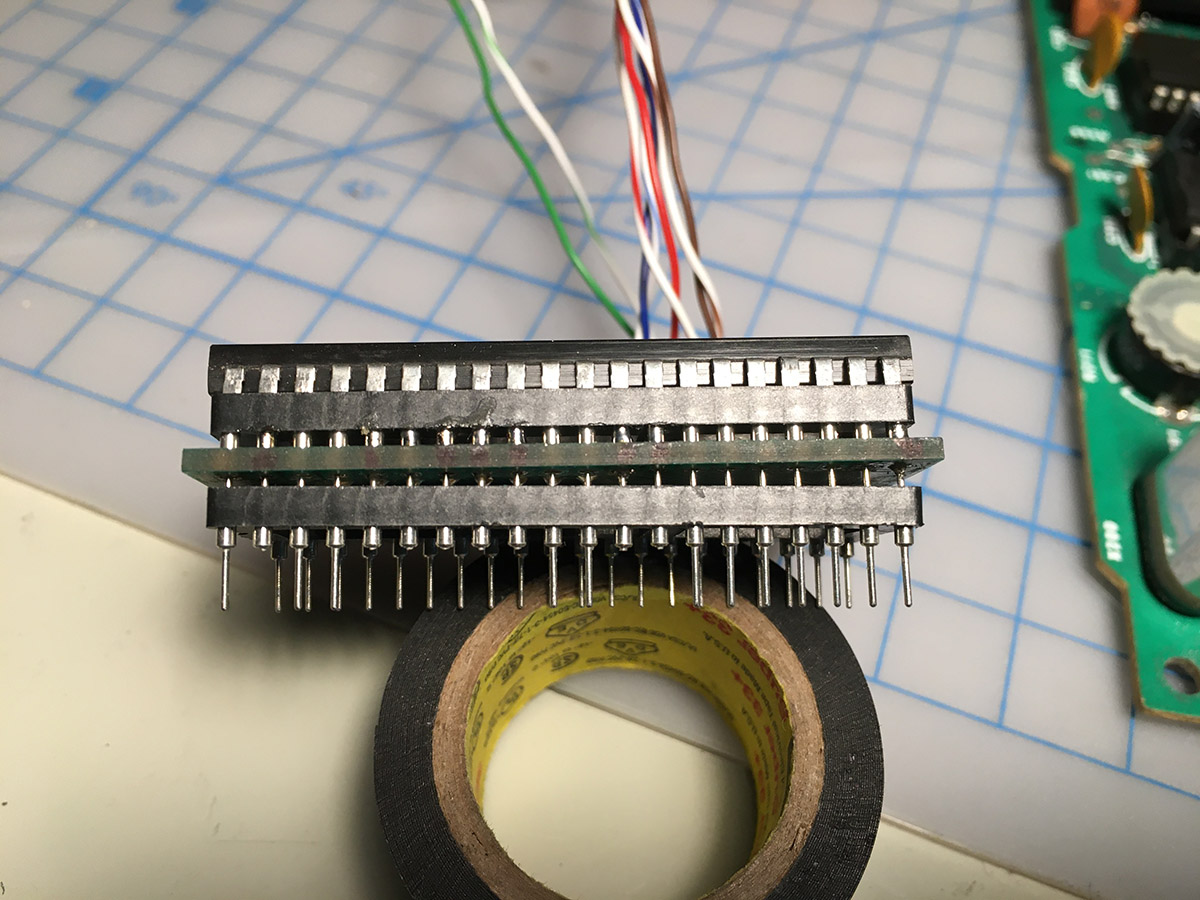
Pulling the lower socket off revealed why. A little excess solder on the pins on the underside of the mod was preventing the pins from fully seating into the socket. You could make them seat temporarily, but they'd pop back out. (Note: the blue resistor network isn't the culprit. I had cut a relief into the socket to clear that during the original install).
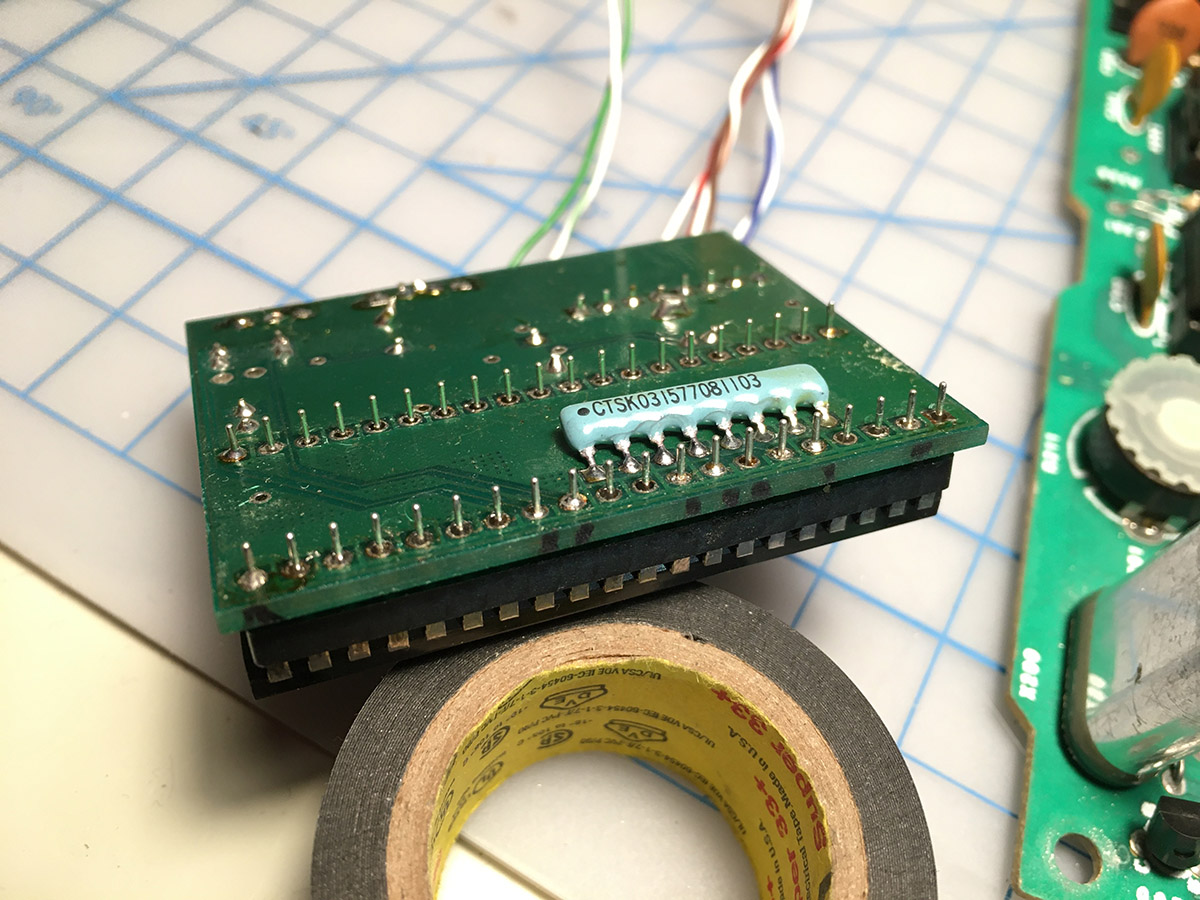
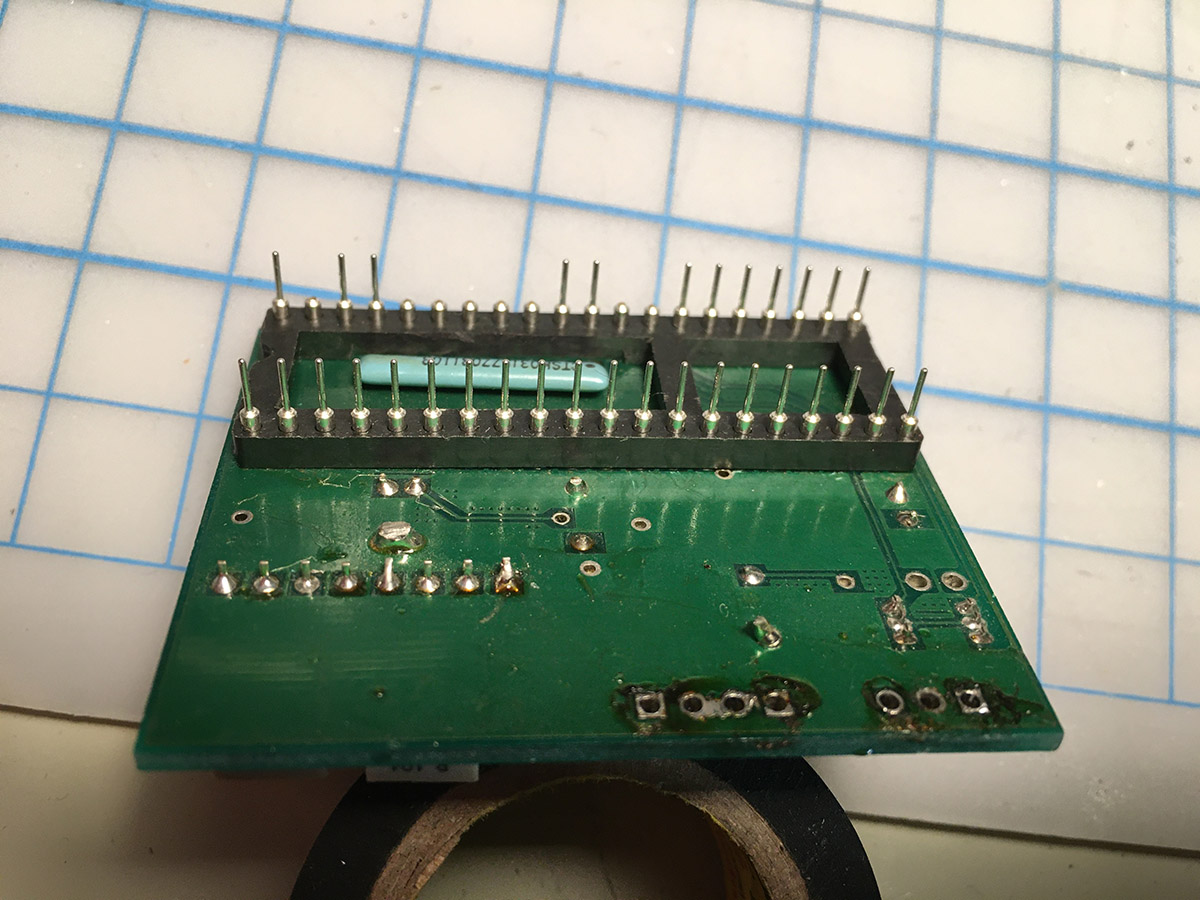
A few quick hits with the desoldering gun later, and the mod snapped back together, fully seating the pins into the socket.
Much better!
I'm not going to bore you (too much) with the details of rewiring everything. A lot of this was effectively covered in the repair of James' console.
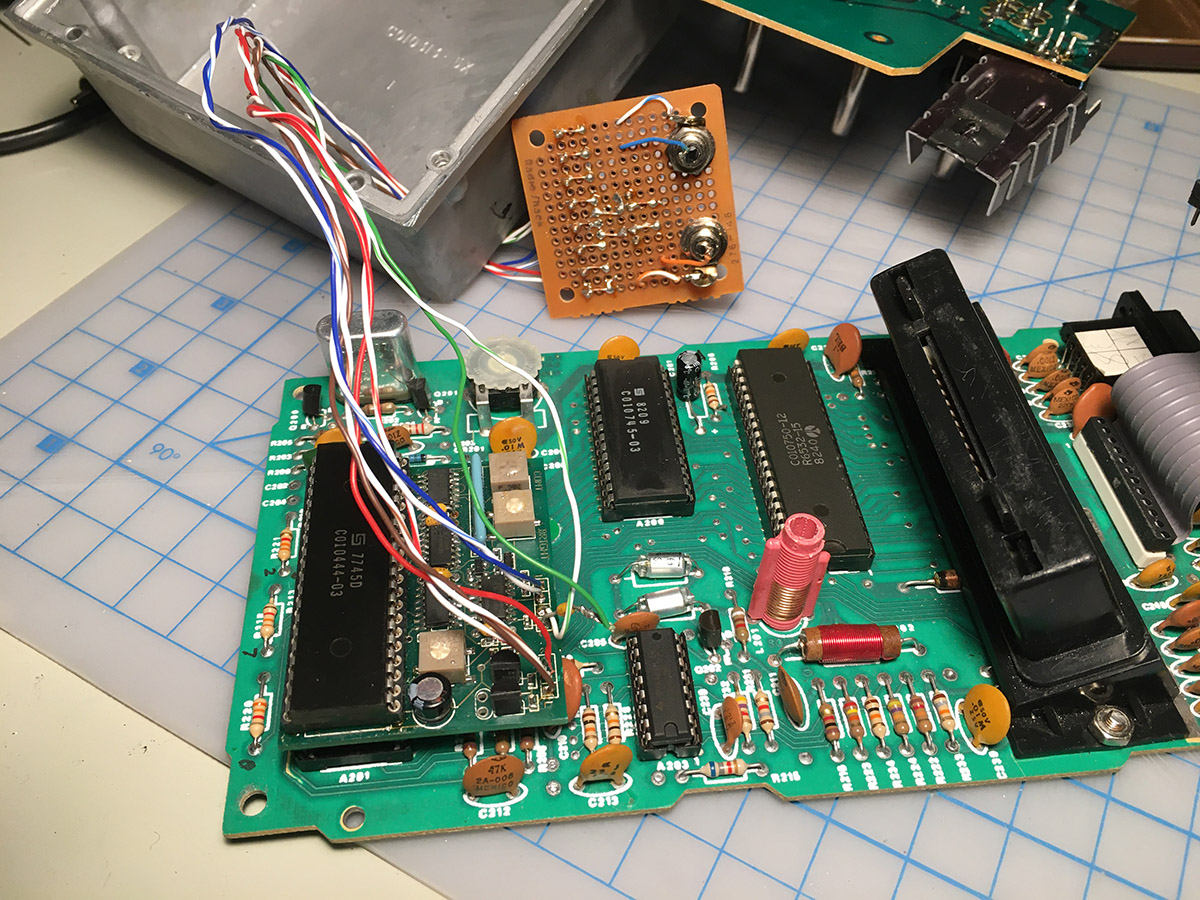
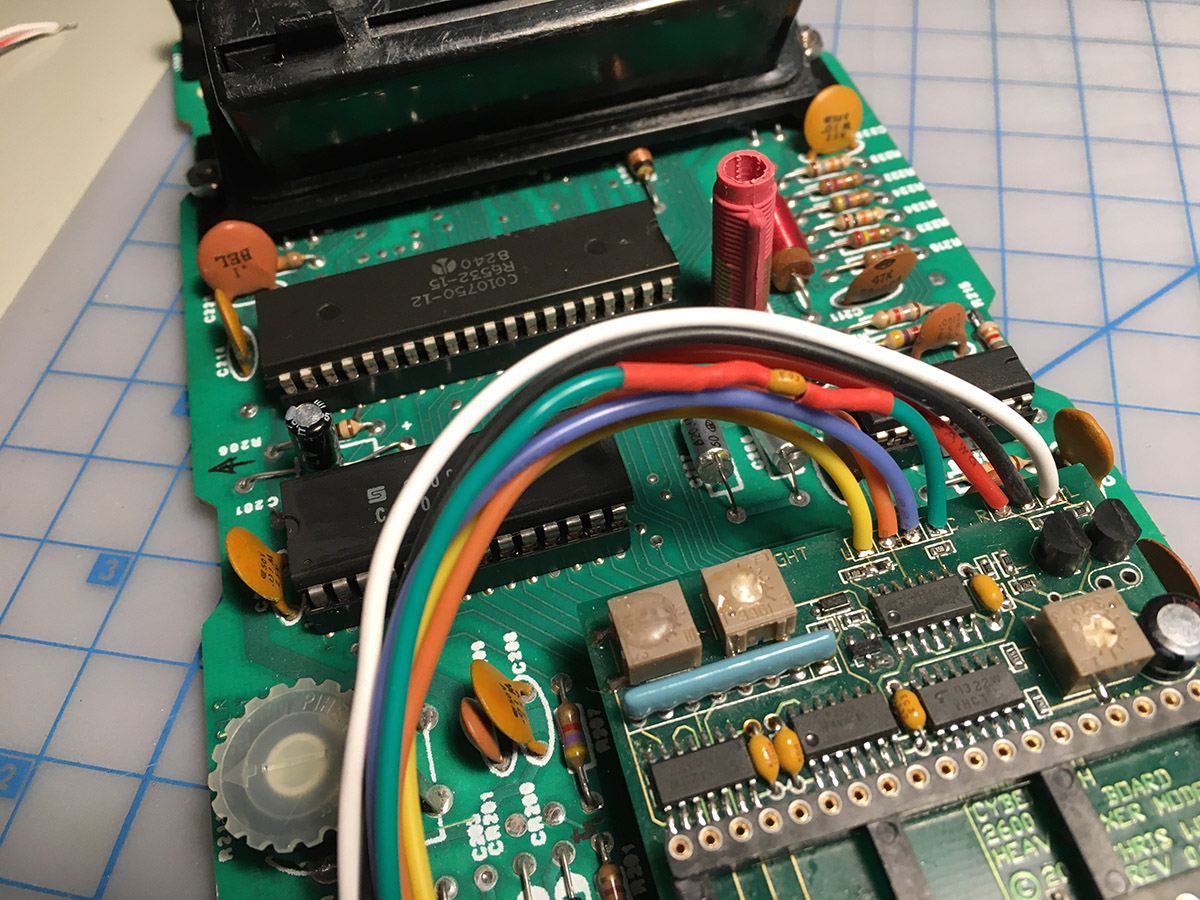
But here's the mod, reinstalled, with fresh, new wires. They've been taped flat to go around the front edge of the board (not through the shield).
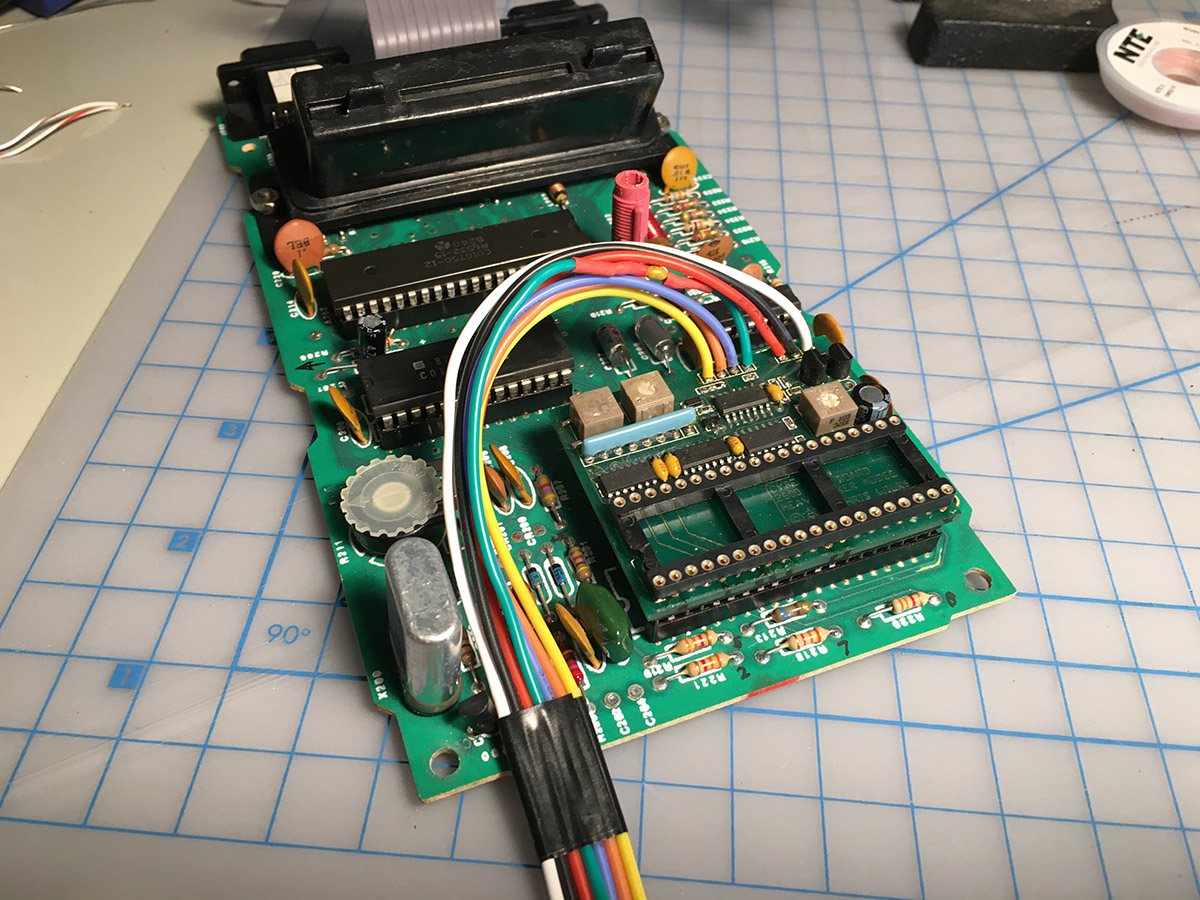
The capacitor is now inline, so the leads aren't under stress. Plus they're protected with some heat-shrink tubing now, too.
And finally, with the TIA back in its rightful place. And I only accidentally bent one pin the wrong way putting it back, too! ![]()

So, with the mod back together. Time to work on the rest of the wires.
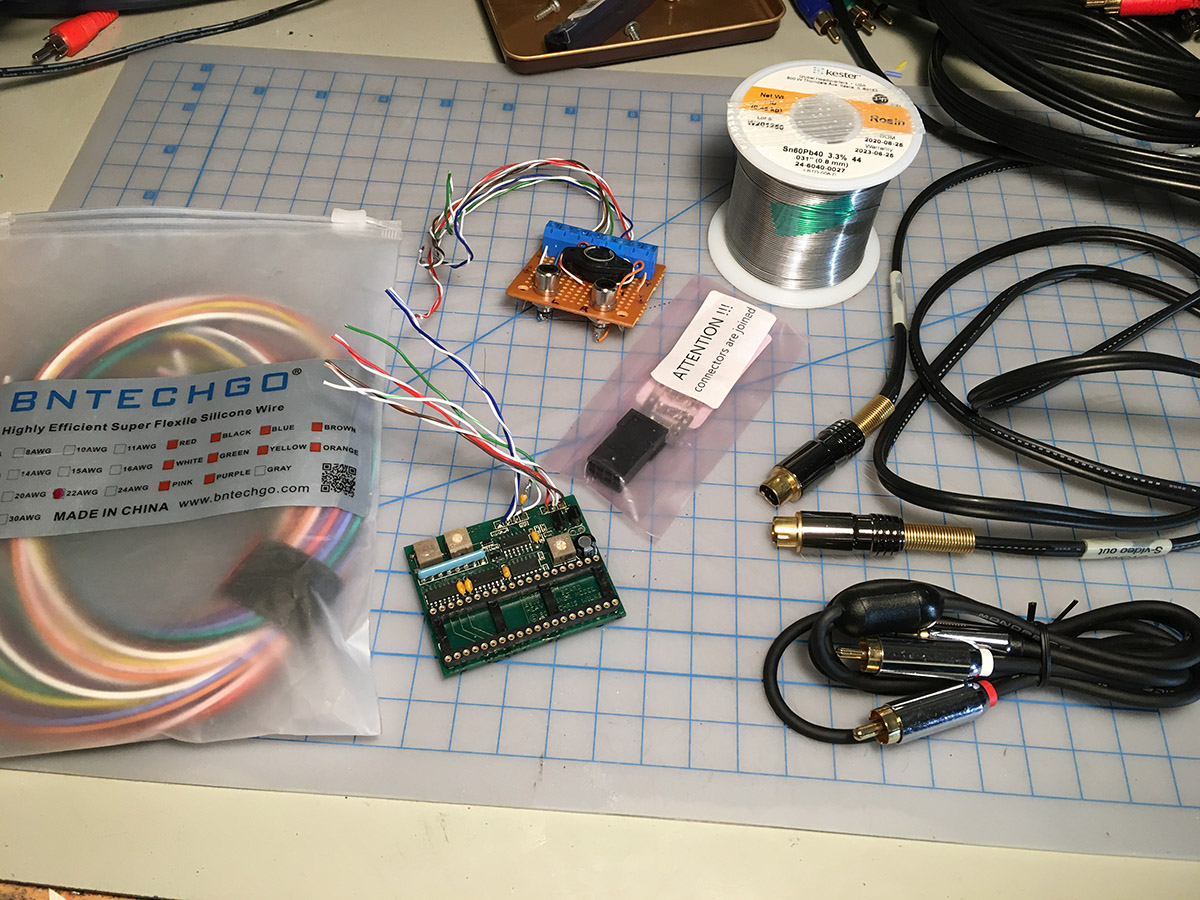
As mentioned earlier, I wanted to get rid of the ungainly 12-foot cable that I had to drag around behind my 2600. This would now be left plugged into my AV receiver.
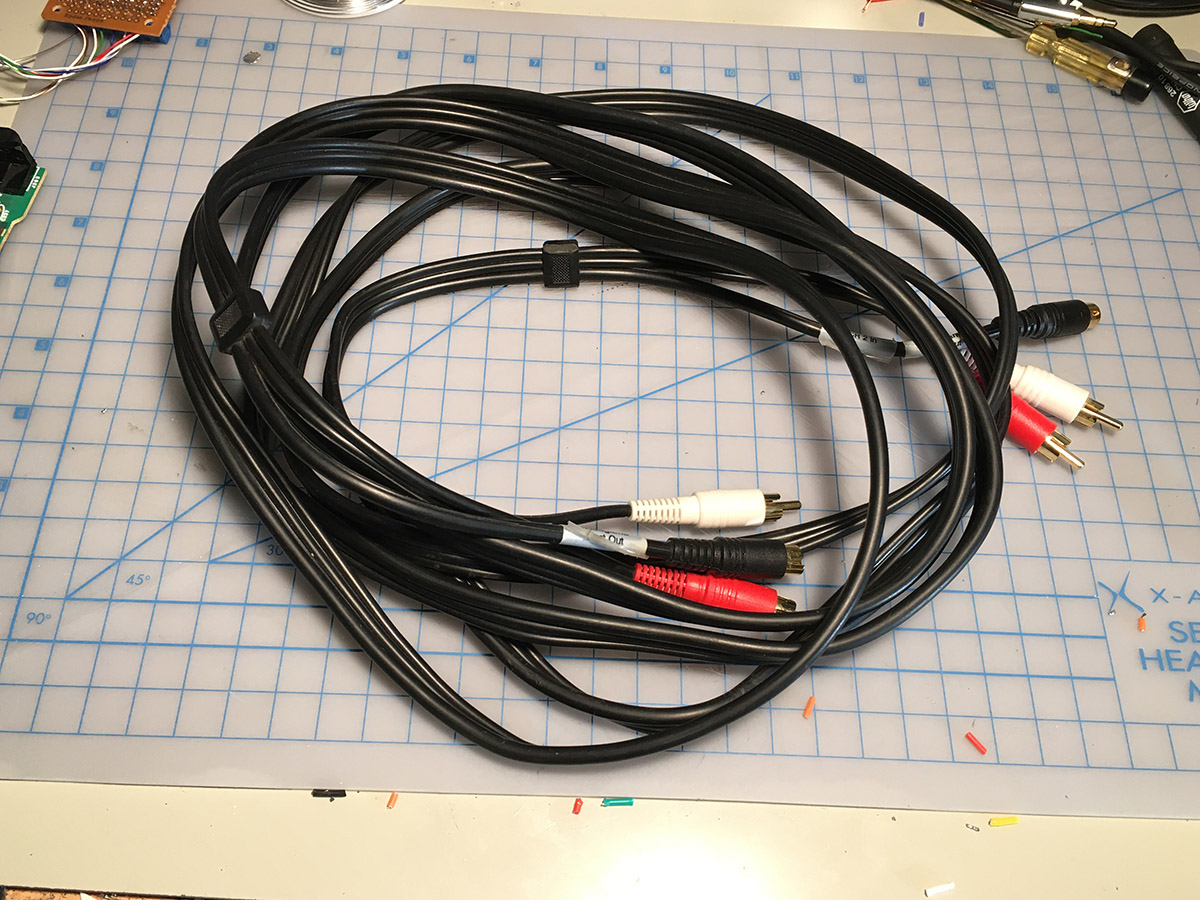
On the 2600 side of things, I'd use short cables, about a foot long, hanging out the back. These are the sacrificial cables I'd be using, shown below. The audio cable would be from Monoprice (I really like the RCA connectors they use in their Designed For Mobile line), and the S-Video cables are from Clark Wire and Cable. (These were custom made, lossless cables for an S-Video router I had in my office, that has since been retired.)
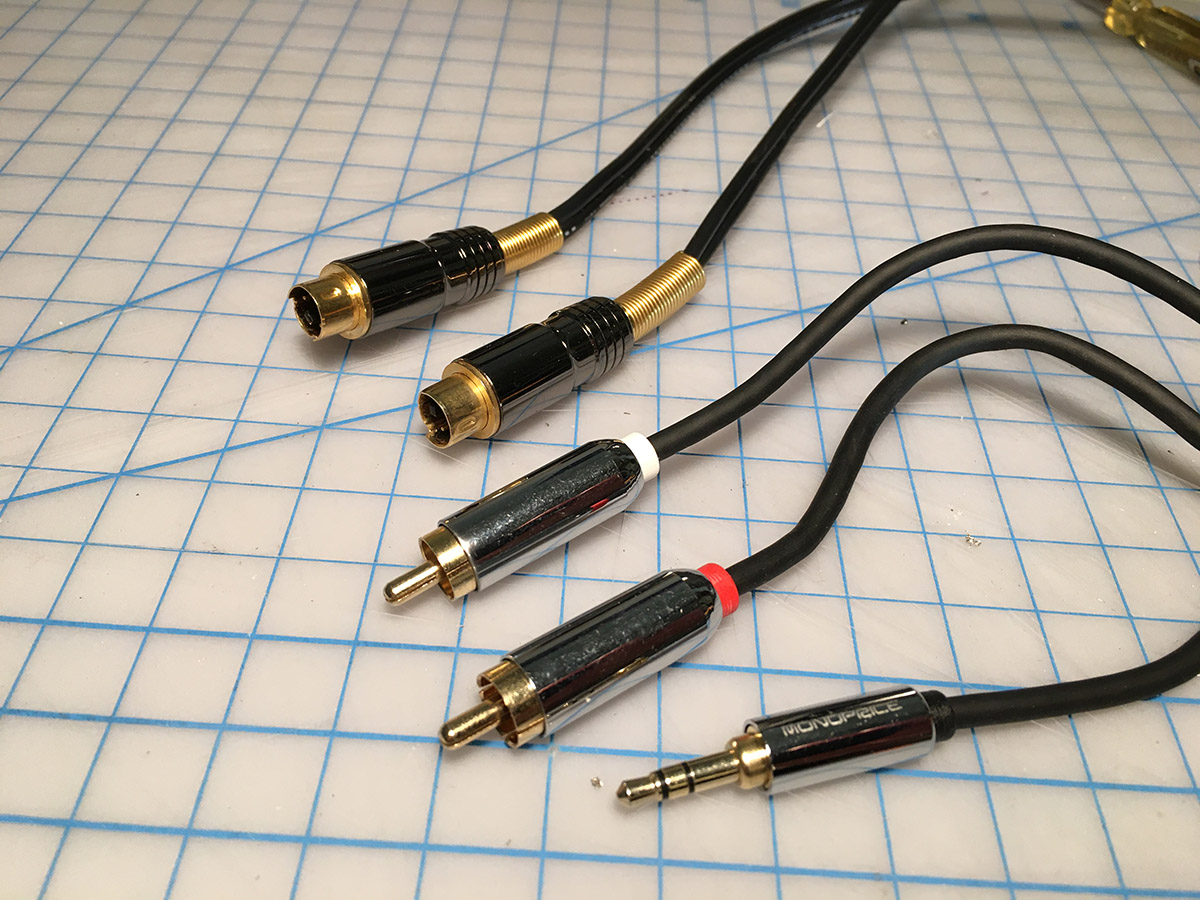
To connect the console's cables to the main AV cable, I'd simply use barrel connectors.

First though, testing! Having the old mod test board around (as well as another terminal block to bridge the cables) let me do end-to-end continuity testing.
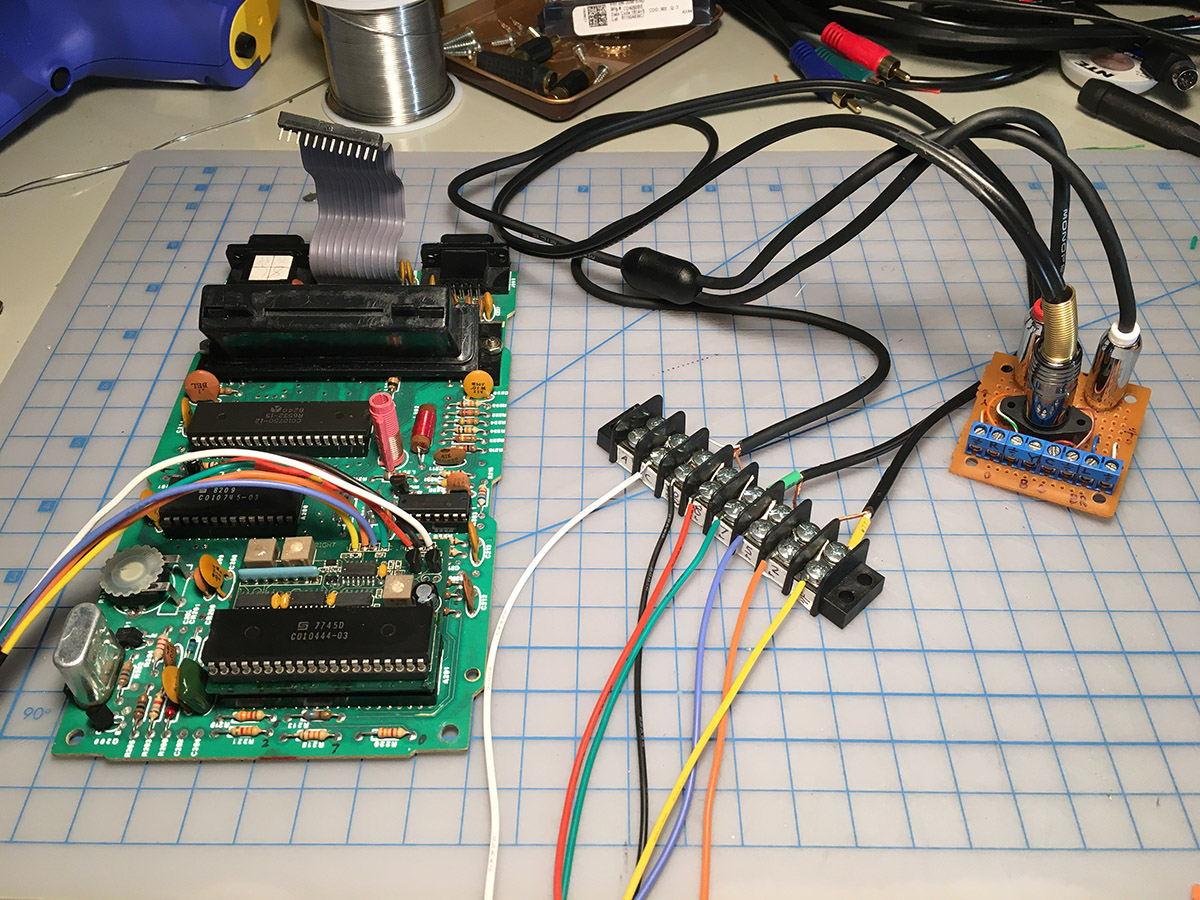
Next, it was time to hook up the cables to a monitor (note the barreled connections next to the monitor), and see if everything actually worked.
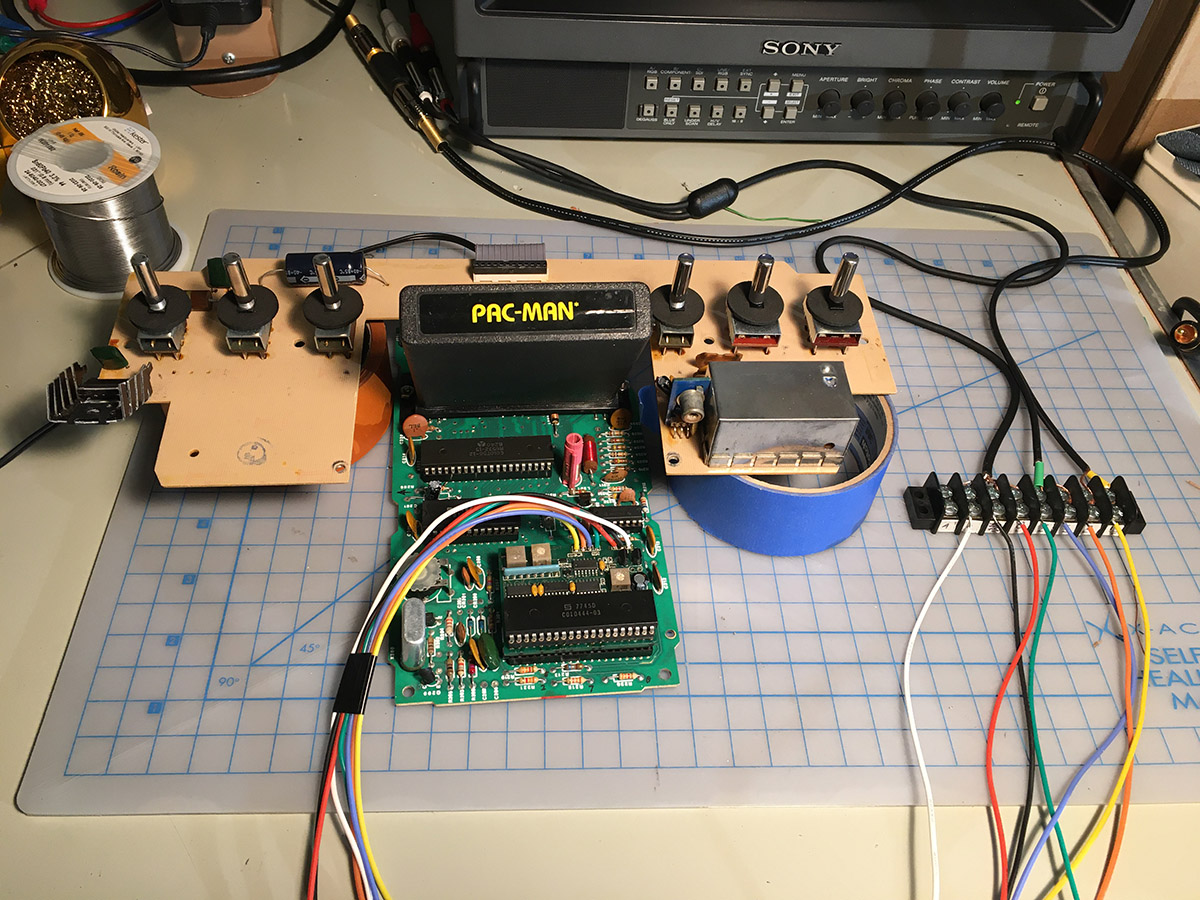
Presto! My 2600 was finally, fully fixed!
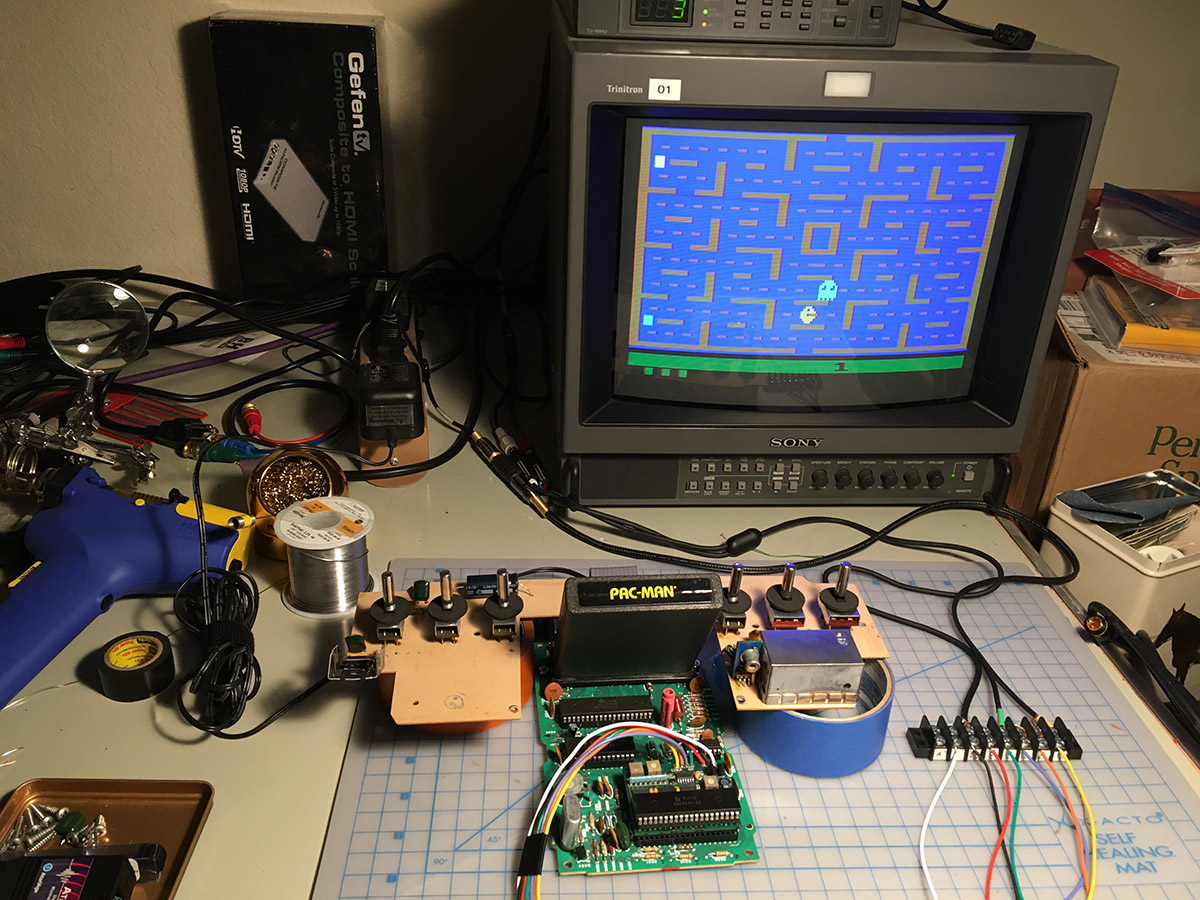
Well, almost... ![]()
Stay tuned for Part 2!
-
 8
8

5 Comments
Recommended Comments