

Making Labels - Part 6

Entry posted by Guest
1,317 views
Well, since there's now a label contest for Strat-O-Gems underway, I suppose I should wrap up this tutorial, just in case people can make some use of it. ![]()
Part 6 - Highlighting
Highlighting is part of the shading process. You're defining a light source, and then using that to apply light and dark values to an object. I make highlighting a separate step, just because it's a more flexible way to work. By putting highlights on a separate layer in Photoshop, it allows me to go back and adjust them to be stronger or weaker, without affecting anything else.
Highlights are caused as an object catches and reflects light. Shading (or shadows) are the opposite - they're caused by the lack of light on an object, or an object blocking out light. How an object catches light depends on a few things - the intensity of the light, the proximity of the light to the object, and the surface of the object.
Surface texture
The highlight on an object will tell the viewer a lot about the surface texture.
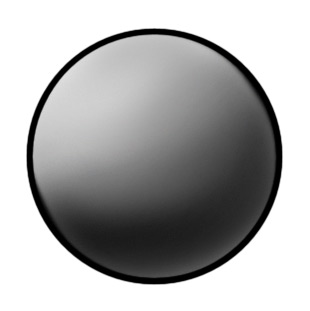
Here's a shaded sphere, with no highlight:
By applying different highlights to it, we can change the surface.
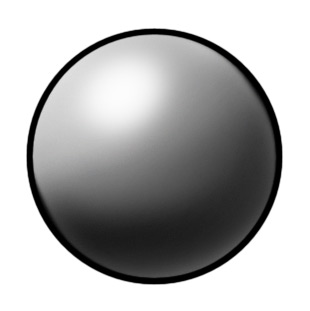
A soft highlight makes the surface appear dull, like a rubber ball:
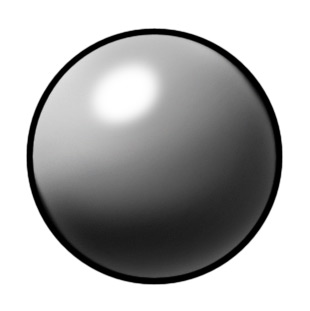
A harder-edged highlight makes the surface appear a bit harder or shinier, like an old bowling ball:
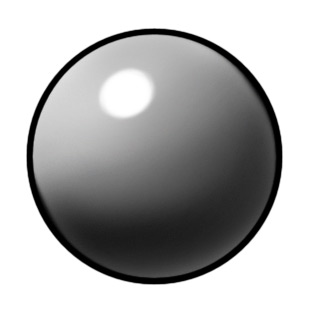
Finally, a very sharp highlight makes the surface look very hard and shiny, like polished wood:
The best way to see how a particular surface reflects light is to observe the real thing. What do highlights look like on plastic? Or on a leather jacket? Or painted metal? Use lights and real objects if you get stuck and can't figure out why something isn't looking right. You can also use highlights to make objects appear dry or wet.
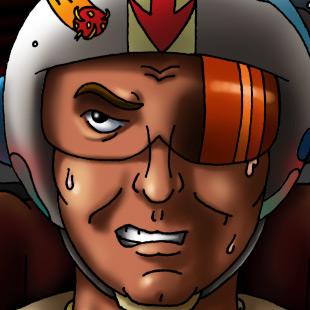
Here's the pilot's face without highlights:

Line art by Jess Ragan
In order to make it appear more like he was sweating, I put a couple of shiny highlights on his face:
The softer highlights on the rest of his face add extra depth that the shading alone couldn't. Admittedly, the highlights are a bit of a cheat, since the main light source (the sun) is behind him. But in order to have clarity, sometimes you have to bend the rules. But the overall lighting is still consistent with a light source to the top and left of the picture.
As mentioned in an earlier tutorial, the goggles' color is on a separate layer, so I'm able to match the highlighting on the rest of his face. For the part of the goggles that needs its own highlight, I'll just throw that on a separate layer. Again - it's all about being able to go back and change things later if I need to.
Distance vs. Intensity
Generally, the closer the object is to a light source, the larger the highlight will become. The more intense a light source is, the stronger the contrast will be between the highlight and the rest of the object. A more intense light source does not necessarily mean a larger highlight though. Usually, the size of the highlight has more to do with how close the light source is to the object, since the highlight is a reflection of that source.
So if you have an extremely bright source, like the sun, it may create a very bright, but relatively small highlight. But if you have a large but softer light source like a big-screen TV, the highlights it creates will be pretty large, but relatively dim. And... they'd probably be in color.
Colored light
Having color in a highlight can really sell the idea that something in your scene is really being illuminated by a particular light.
For Solar Plexus, I added a few colored highlights on the pilot and his seat, where they were near the control panels:
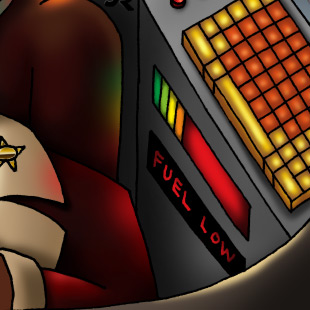
This is a pretty simple effect to achieve, but it's very effective. Having light from within the scene interact with objects around it adds a sense of reality to the picture. Note that I didn't use the word "realism". I'm not going for photo-realism in this picture, since it's not a photo-realistic illustration. But I still want to create the sense, or illusion, that this place has its own reality, and I want the viewer looking at the artwork to be pulled into it. Creating a reality means coming up with a consistent style that you stick with for the entire illustration. This applies to any drawing style - whether illustrative, painterly, flat cartoon, or whatever.
Different styles
Solar Plexus is probably best described as "airbrush style". The shading is very smooth, the highlights tend to be pretty strong. Sometimes the hardest part of creating label art is to figure out what style the artwork should be. Sometimes I'll just get a picture in my mind that requires a certain style, and nothing else will work for it. Other times I'll be stuck for a style to use, and drawing a few sketches will help. How rough the sketches are may suggest the style needed. If I spend a lot of time fussing with the line art to make the idea read, then a very clean style may be in order. But if the rough sketches look good from the outset, then maybe a more painterly approach is best. Solar Plexus came to me as detailed line art, so that pretty much defined how I was going to approach coloring it. While a different, looser style may have also worked for it, it would have changed the nature of the illustration. It all depends on what you're after - but don't be afraid to experiment. Remember - you don't have to show the stuff that doesn't work to anybody. ![]()
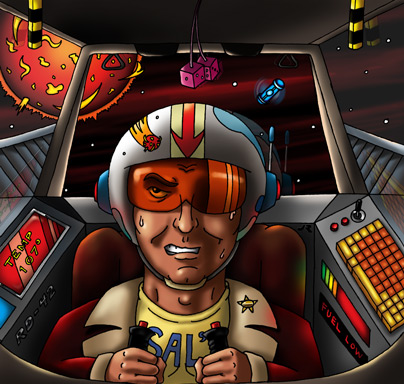
Almost there!
So here we are, with the artwork all shaded, and highlights added:
And here, shown over a black background, are just the highlights:
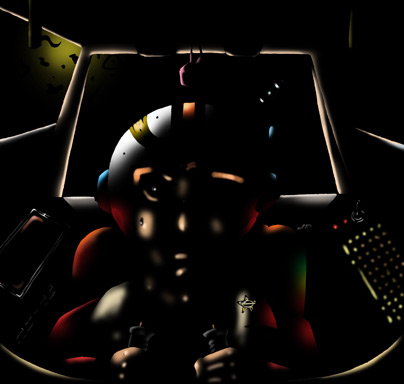
Up next: the final installment!
0 Comments
Recommended Comments
There are no comments to display.